It is time. Ditch that Gmail or Yahoo email account and step into 2021 with a fresh, professional, and custom business email address.
sales@yourbusiness.com
With an email address that matches your business, you signal trust and professionalism. Oh, and it is SUPER easy-to-do.
Here’s what you need to get a custom email address. Choose a domain name, purchase hosting, create your new business email address, and link your new address to a client such as Gmail.
Okay, let’s get down to business.
Step 1) Choose a domain name
Click here to Register a Domain and look for a domain name that fits your business. Here are some tips to keep in mind when choosing a domain name. If it’s available, proceed to checkout.
We will be using the PRO package, which is $8.95/month. There are free web hosts, but we cannot recommend those in good faith.

Step 2) Create an email account
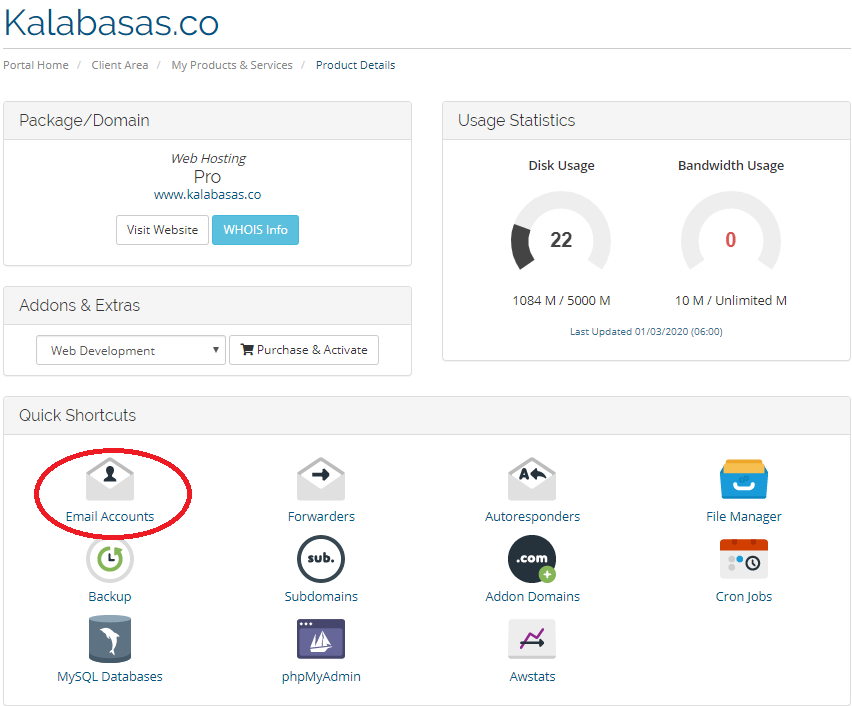
Now that we have a domain and web hosting, it is time to create our custom email account. From the Host Little client dashboard, click on your services, and then click on Email Accounts
Now, click Create and fill out the required fields.
There are many tips for choosing the format of your email address name. However, the main rules are to adhere to a standard format for all emails within your company and to make sure that you have a generic email to field general customer questions.
Here are the most important tips for choosing your custom email address:
- Use a standard format for all employees
- Create generic email addresses for your website
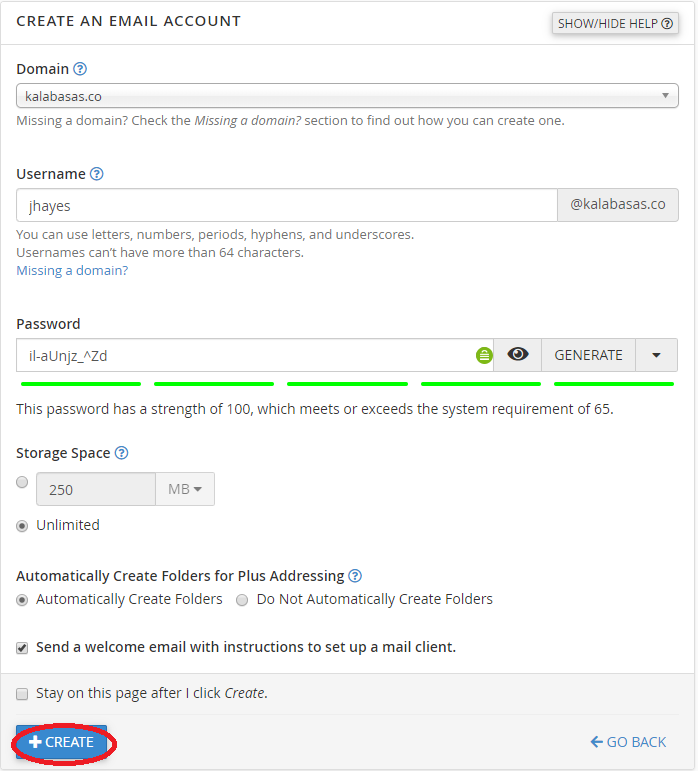
Perfect, we just created our custom email address. Now it is time to link it to a client we are familiar with. For this tutorial, we’ll use Gmail.
Step 3) Link custom email to Gmail
When viewing our newly created email addresses, click Connect Devices on the far right side.
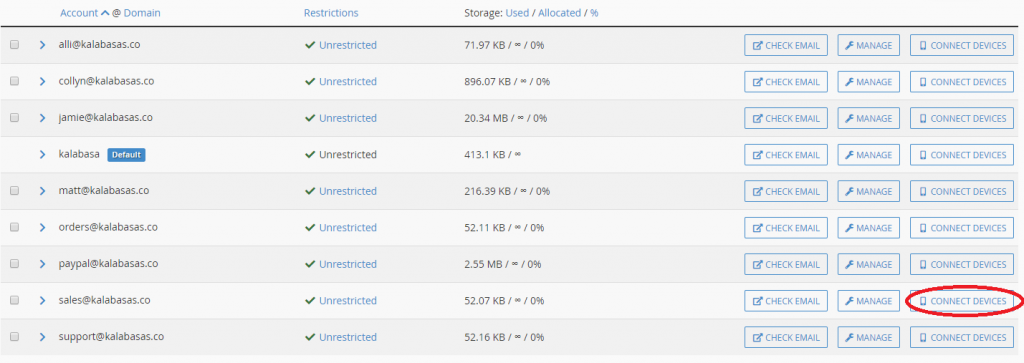
The information we are looking for is here:

This information can be used to connect your new email address to any third-party clients. We will be using Gmail for this tutorial.
Login to your Gmail account or create a new Gmail if you don’t have one already.
From your inbox, click the gear in the upper right-hand corner (below your user picture), then select “Settings.” Select the “Accounts and Import” tab at the top, scroll down, and click the “Add a mail account” button.
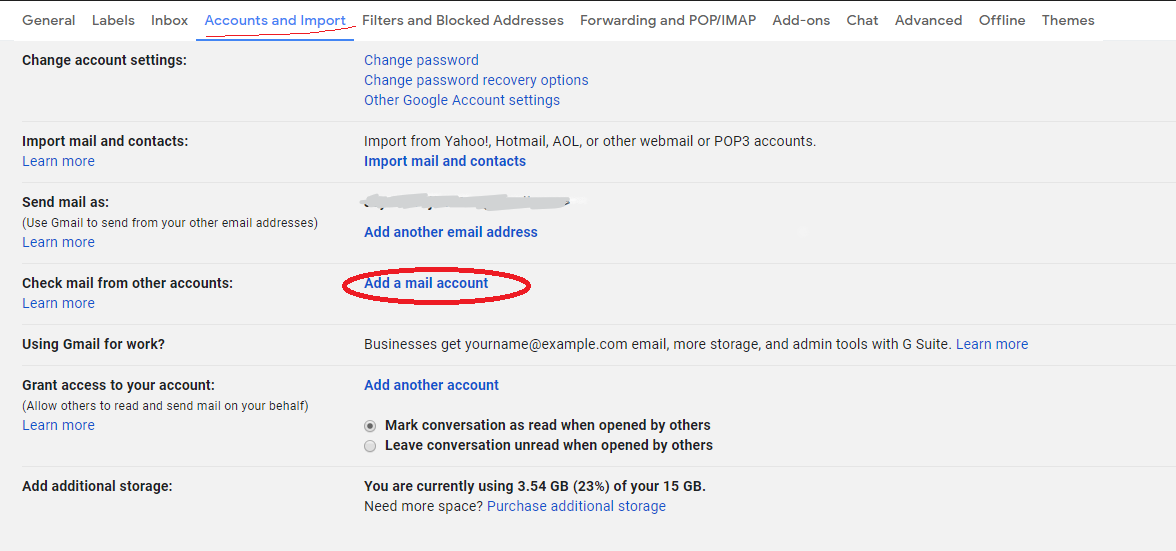
This will open a pop-up window where you’ll enter your new Host Little business email information.

Next, click Import emails from my other account (POP3)

Finally, enter the information we pulled up at the beginning of Step 3 and hit Add Account.

Now that your mail account has been added, you will want to ensure that you not only receive your new address emails in your Gmail inbox but that you can also send emails from Gmail using your free custom email domain. To do so, select the first option from the next screen, “Yes, I want to be able to send mail as name@yourdomain.com” and click “Next.”
Now Google is sending us a verification email. Go to the list of email accounts (Host Little Dashboard > Services > Select service > Click Email Accounts) and click on Check Email
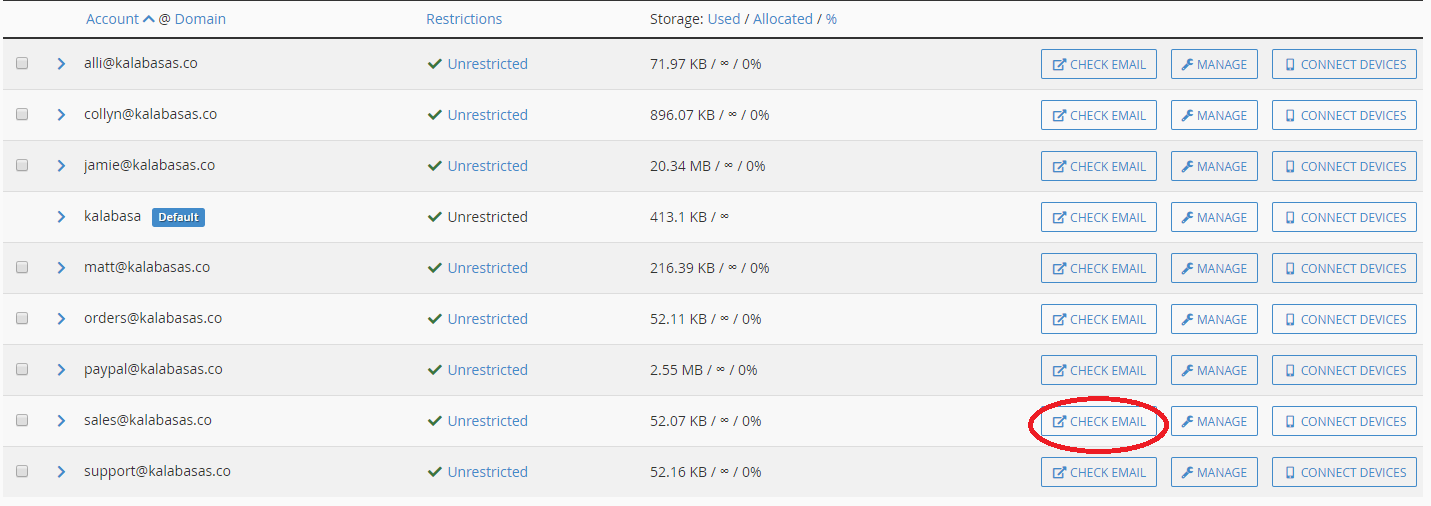
Copy that code, return to Gmail, and paste the code into the verification box to confirm you are the owner of that email address. Click “Verify.”
Now that you have connected your email address to Gmail, try using your new custom email domain. Click on “Compose” in Gmail to open a new email. In the “From address” field, you will have the option to choose between your Gmail address and your new custom email address from Host Little. Choose the one you want to use when sending your new message.
Looking for Small Business Web Design? Check out Lakeside Web Design!
Did we miss anything? Let us know in the comments if you have any questions!
